Seasonal home care
Spring Cleaning Checklist for Dust, Windows, Shelves, and Stored Items
A useful spring cleaning checklist for this task is simple: clear the surface first, work from high areas down, clean windows before floors, empty shelves before wiping them, sort stored items before returning them, and pause when a surface or object looks delicate, damaged, damp, or material-specific.
This is not a full-house overhaul. For this page, the task is visible dust, smudged glass, shelf edges, window tracks, and the boxes or baskets that have been sitting quietly through the colder months. Work in daylight if you can, keep paper and photos dry, follow cleaner labels, avoid casually mixing products, and return fewer, better-placed objects to the room.
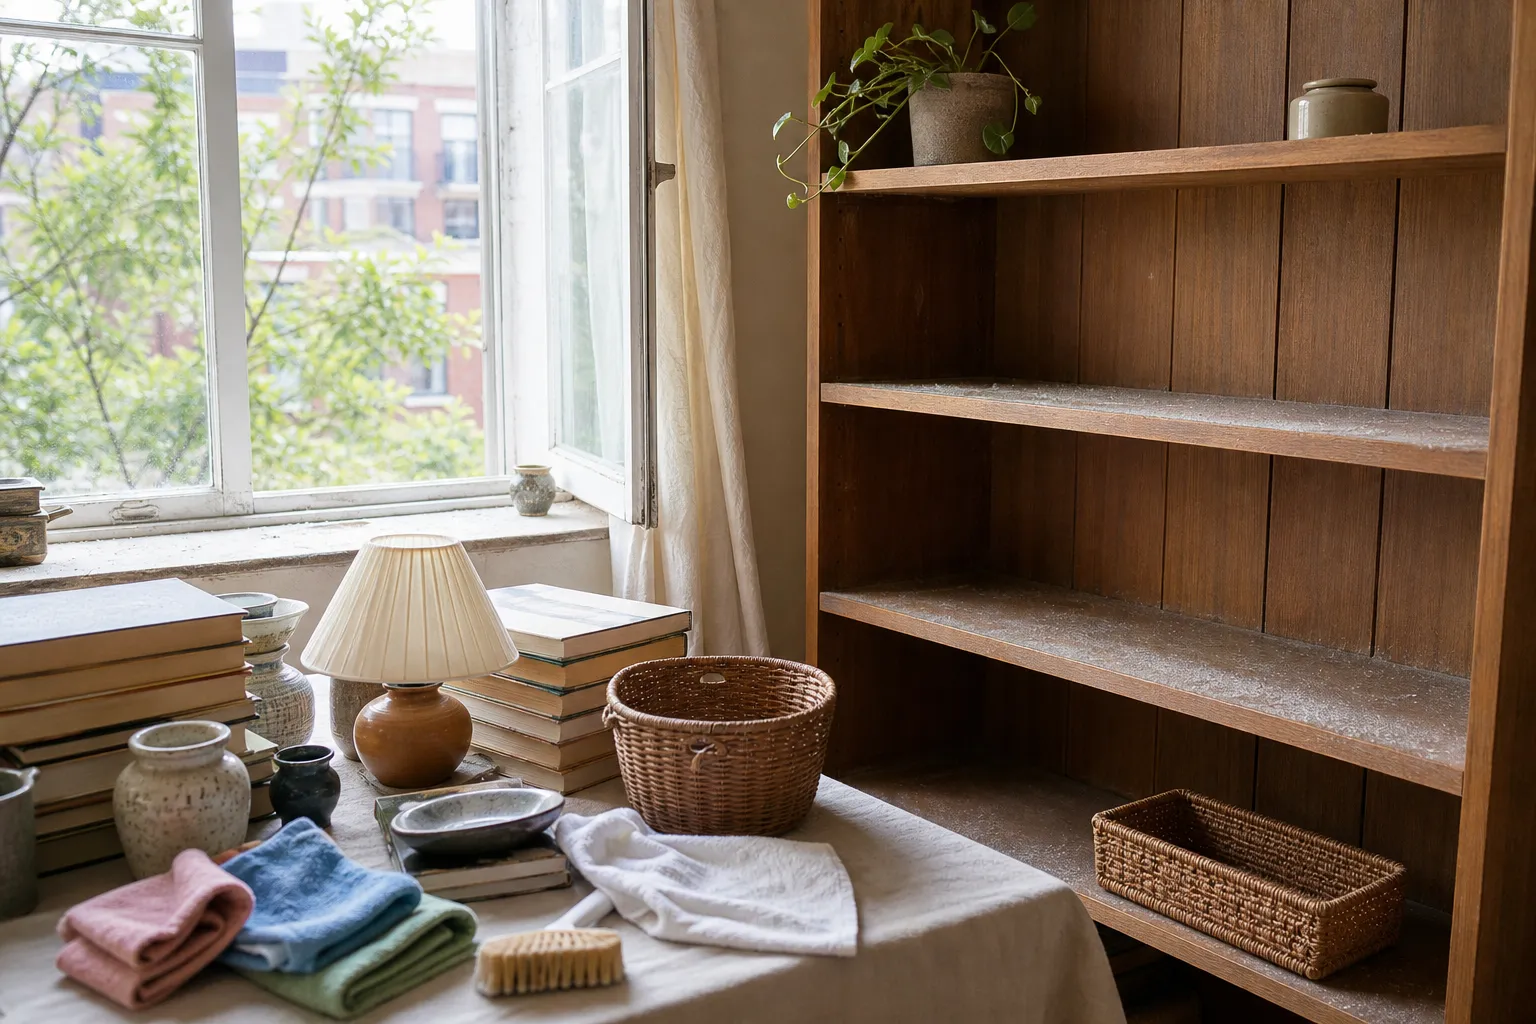
broader context
Broader context
Use the broader page when you need more context before this narrower page.
A Practical Route for Dust, Windows, Shelves, and Storage
Use this as a room-by-room route, not a race. One bedroom, sitting room, study corner, tea shelf, entry shelf, or storage closet can be enough for a day.
1. Gather a small working kit
Set out only what you are likely to use:
- Microfiber cloths or soft lint-free cloths
- A vacuum with a suitable attachment, if available
- A small soft brush for dry dust in corners or shelf seams
- A bucket or bowl for rinse water, if you are using water
- A glass cleaner or mild cleaner suited to the surface
- A dry towel for window frames, tracks, and shelf edges
- A few bags, boxes, or baskets labeled: keep, relocate, repair, donate, discard
- Gloves if the cleaner label recommends them, or if you prefer them for dusty work
Avoid pulling out every cleaner in the home. More bottles can slow the job and increase the chance of using the wrong product on wood, coated glass, painted surfaces, paper, or fabric.
2. Clear before you clean
Remove objects from the area before wiping. Do not clean around books, bowls, frames, storage boxes, candles, lamps, or small ceramics. Dust collects along edges, behind objects, and underneath them.
For shelves, place items on a table or cloth-covered floor in loose groups:
- Daily-use objects that should return
- Seasonal objects that can be stored elsewhere
- Paper, photos, notebooks, and keepsakes
- Delicate pieces such as ceramics, lacquered items, painted objects, or fragile glass
- Items that need repair, airing, or closer inspection
An empty surface is easier to clean evenly. It also gives you a natural pause before putting everything back exactly as it was.
3. Work from high to low
Dust higher areas first so loose material does not fall onto a freshly cleaned lower surface. In an ordinary room, that may mean:
- Tops of tall shelves or cabinets
- Curtain rods, upper window frames, and high ledges
- Wall-mounted shelves or picture frames
- Open shelving and tabletops
- Lower window tracks, baseboards, and floor edges
- Floor or rug area last
Keep the movement controlled. A loose feather-style duster may simply move dust across nearby objects. A vacuum attachment, soft brush, or lightly damp cloth can work better on sturdy surfaces, but match the method to the material. Unfinished wood, paper, textiles, and delicate finishes should not be treated like sealed laminate or ordinary glass.
4. Remove loose dust before wet wiping
For shelves, ledges, and window frames, take off loose dust first. If you wet-wipe a very dusty surface immediately, you can make streaks, gray residue, or paste that takes longer to remove.
A steady sequence:
- Vacuum or dry-dust loose material from corners and edges.
- Wipe sturdy surfaces with a cloth lightly dampened according to the surface and cleaner label.
- Follow with a dry cloth if moisture remains.
- Let shelves and tracks dry before returning objects or storage boxes.
Do not spray cleaner directly over books, paper, textiles, electrical items, unsealed wood, or delicate objects. If a cleaner is needed, apply it to the cloth first unless the product directions say otherwise.
Windows, Frames, and Tracks
Windows change the room quickly because they affect light. In spring, they also reveal dust on sills, dried water marks, fingerprints, surface film, and debris caught in tracks. Keep the order simple: glass, frame, sill, track, then nearby floor.
Window glass
For ordinary modern window glass:
- Dust the frame and sill first.
- Clean the glass according to the cleaner label.
- Use a clean dry cloth to finish edges and corners.
- Check from the side, not only straight on, because streaks often appear when the light shifts.
Do not over-spray. Trigger sprays can land on painted wood, metal hardware, textiles, paper, and your hands. A controlled amount on the cloth is often enough for small panes or interior smudges.
Frames and sills
Frames and sills collect visible dust, water spots, sticky residue, grit, plant soil, and marks from objects that sat there through winter.
Use a gentle order:
- Remove plants, bowls, candles, and small objects.
- Brush or vacuum dry debris from corners.
- Wipe the sill and frame with a cloth suited to the material.
- Dry corners where moisture can sit.
- Return only items that tolerate light, temperature changes, and occasional condensation.
Painted wood, unsealed wood, metal, vinyl, and stone do not all want the same cleaner. When in doubt, test a small hidden area and avoid abrasive pads.
Window tracks
Tracks are easy to ignore because they are narrow and often hidden by the moving sash. They are worth including in a seasonal dust cleaning checklist because they hold grit and old residue.
A simple approach:
- Open the window if conditions allow.
- Vacuum loose grit with a narrow attachment.
- Use a soft brush or cloth-wrapped tool for corners.
- Wipe with a lightly damp cloth if the material allows.
- Dry the track before closing the window fully.
Do not scrape aggressively. If the window is stuck, cracked, painted shut, unusually old, or part of a decorative or antique assembly, stop and look for material-specific guidance instead of forcing it.
Shelves and Objects
Shelves are not only storage. In many homes they hold the small rhythm of the room: tea tins, bowls, incense holders, books, framed photos, seasonal branches, folded cloths, tools, keys, or family objects. A spring home reset is a good time to clean the shelf and ask whether it still serves the room.
Open shelves
Use this checklist:
- Remove everything from one shelf at a time.
- Group objects by material: paper, ceramic, glass, wood, metal, textile, mixed material.
- Dust the shelf surface, back edge, side supports, and underside lip if reachable.
- Wipe only if the shelf material and finish can handle it.
- Dry the shelf fully.
- Dust each object gently before returning it.
- Leave some open space so future dust is easier to see and clean.
The underside and back corners are often missed. So are the narrow lines where a shelf meets a wall or bracket. If you clean only the front edge, the shelf may look better for a day while dust remains behind the objects.
Books, papers, and photos
Keep paper dry unless you have material-specific care instructions. Paper, cardboard, and photographs can warp, stain, or hold moisture when wiped with a damp cloth.
For ordinary household paper items:
- Dust around them, not through them.
- Use a dry soft cloth on the outside of a box or binder.
- Move stacks carefully so loose papers do not slide or crease.
- Replace torn folders, crushed boxes, or storage that no longer supports the contents.
- Keep paper away from wet sills, freshly wiped shelves, and damp cloths.
If a photo album, document, artwork, or inherited paper item seems fragile, sticky, flaking, stained, or damp, do less rather than more. Set it aside in a dry place and look for material-specific care before cleaning it.
Ceramics, glass, and decorative objects
Most everyday ceramics can be dusted with a soft dry cloth. Decorative finishes, painted details, repaired cracks, metallic trim, porous clay, and fragile handles call for slower handling.
A useful rule: clean the surface the object sits on more thoroughly than the object itself. If an object is delicate, lift it with both hands, dust the base gently, and return it only after the shelf is dry.
Pause before using water or cleaner on:
- Unglazed clay
- Painted or gilded surfaces
- Cracked glass or ceramic
- Antique or inherited objects
- Lacquered, shell, bone, paper, or mixed-material pieces
- Anything with loose parts, lifting finish, or an unknown coating
This is not about turning a home into a museum. It is about noticing that not every object wants the same cloth, moisture, or pressure.
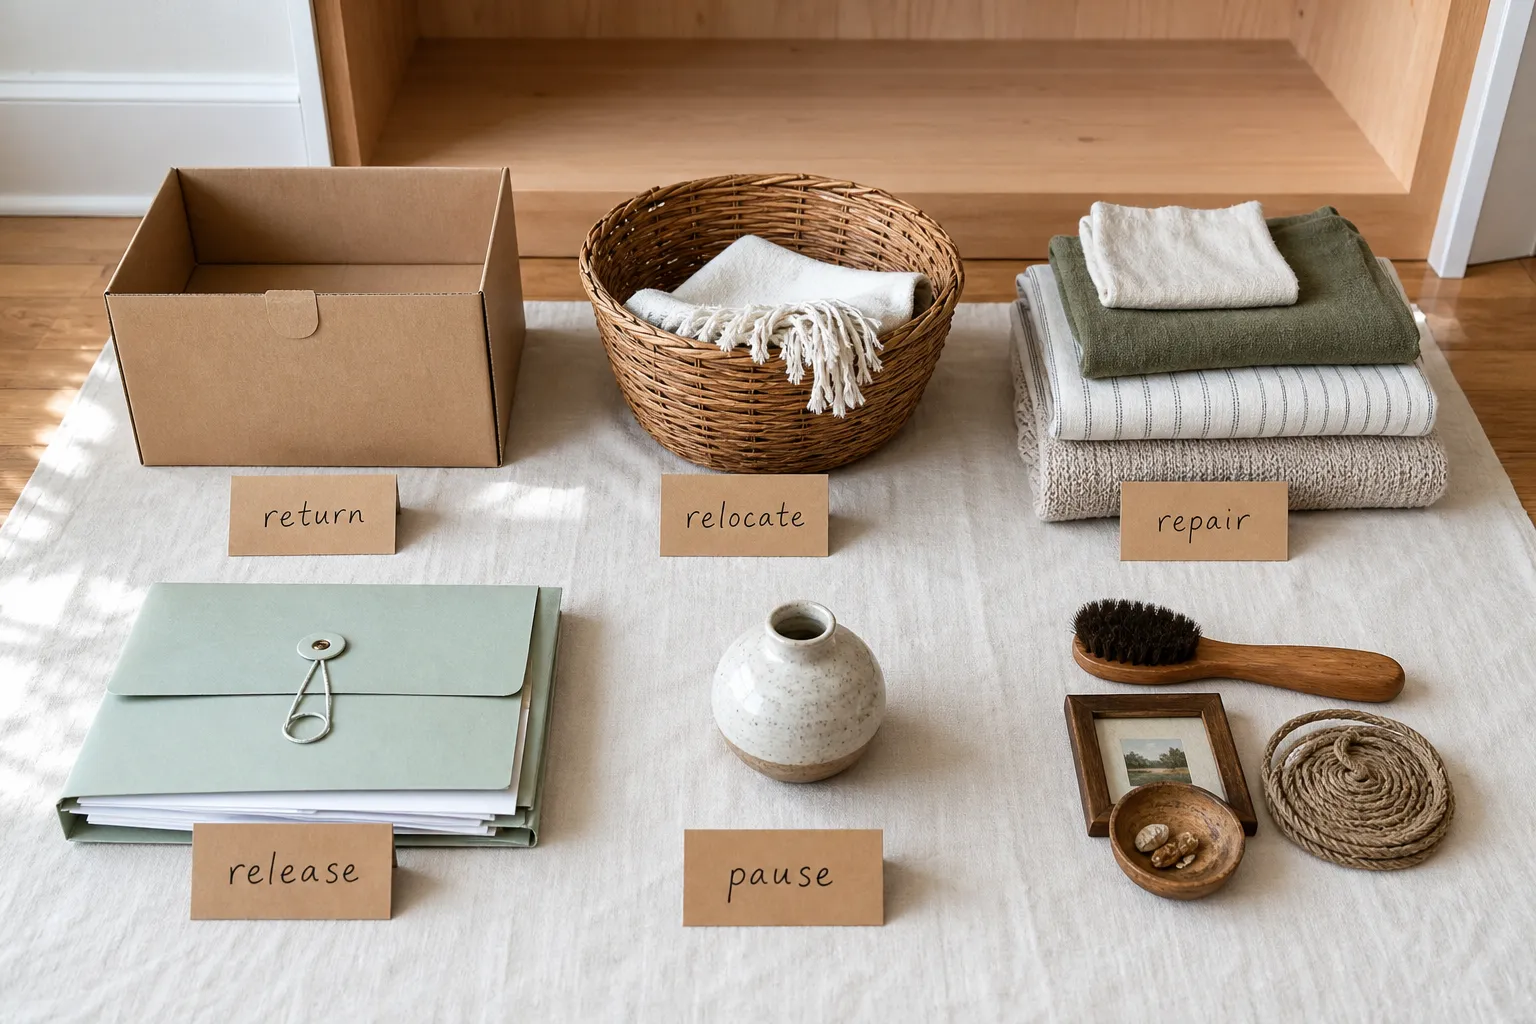
Stored Items: Sort First, Then Clean the Empty Place
Stored items create the biggest spring cleaning drag because they ask two questions at once: “How do I clean this?” and “Do I still need this here?” Separate those questions.
Sort one small area at a time
Pull out one box, basket, drawer, or shelf section. Do not empty an entire closet unless you have enough time to finish.
Use five simple groups:
- Return: belongs here and is still used
- Relocate: useful, but stored in the wrong room
- Repair: needs mending, tightening, washing, or another small action
- Release: no longer useful to this household
- Pause: sentimental, uncertain, or needs another person’s decision
This prevents spring household cleaning from becoming a floor full of half-made decisions.
Check condition without over-reading it
Look for ordinary visible signs:
- Dust film on the outside of boxes
- Crushed corners or failing lids
- Musty or stale odor
- Water marks or damp-feeling packaging
- Loose threads, broken handles, cracked containers
- Items stored so tightly that they are bending or rubbing
Do not use a normal spring cleaning checklist for suspected hazardous dust, heavy mold-like growth, pest activity, damaged electrical items, broken glass, or post-renovation debris. Those conditions need specific guidance, not a general household routine.
Clean the storage area before returning items
The empty shelf, closet floor, cabinet base, or drawer is often the real cleaning target.
- Vacuum or dry-dust the empty space.
- Wipe sturdy surfaces if suitable.
- Dry completely.
- Clean the outside of boxes or bins with a dry cloth, or a lightly damp cloth only if the material can handle it.
- Replace damaged containers when they no longer protect or organize the contents.
- Return fewer items with labels facing forward.
Avoid putting clean items back into a dusty or damp storage area. Also avoid sealing damp textiles, paper, or cardboard into closed containers.
What Changes the Checklist
The basic route is steady: clear, dust high to low, clean windows and shelves, sort stored items, dry surfaces, and return only what belongs. A few conditions change how cautious you should be.
Material changes the method
Ordinary sealed surfaces can often tolerate a light wipe. Delicate, porous, painted, coated, antique, or unknown materials need a gentler approach. If the object matters to you and you are unsure, avoid moisture and strong cleaners until you have material-specific care information.
Cleaner labels matter
Different products are made for different surfaces and use patterns. Follow the label for dilution, ventilation, rinsing, and skin or eye precautions. Do not casually mix cleaning products. This article is a household route, not a substitute for product directions.
The room’s use changes what returns
A tea shelf, desk shelf, entry shelf, and linen closet collect different kinds of clutter. Clean the visible surface first, then decide what returns based on daily use. A calm shelf is not an empty shelf; it is a shelf where the objects are easy to reach, easy to dust around, and still wanted.
Certain signs stop the routine
If you find crumbling old paint, heavy dampness, strong unexplained odor, suspected pest activity, damaged electrical items, broken glass, or post-renovation dust, pause. Keep the area as undisturbed as practical and look for official or qualified guidance for that specific problem.
Common Misunderstanding: Spring Cleaning Is Not a Total Reset
A spring home reset is not the same as renovation, restoration, specialist object care, or a guarantee about how a room will affect the body. The useful standard here is visible and practical: dust you can see, smudges on glass, shelves that can be emptied and wiped, storage that can be sorted, and objects that can be returned with more care.
It is also not a product-shopping list. You do not need a new tool for every corner. A few cloths, a vacuum attachment, a suitable cleaner, and enough time to let surfaces dry will usually do more than a crowded basket of specialty products used in a hurry.
Short version to copy
- Gather cloths, a vacuum attachment, a suitable cleaner, and sorting boxes.
- Open the room and improve light if conditions allow.
- Remove items from shelves and windowsills.
- Dust high areas first.
- Clean window glass, frames, sills, and tracks.
- Dust and wipe empty shelves according to material.
- Keep paper, photos, and cardboard dry.
- Sort stored items into return, relocate, repair, release, and pause.
- Check containers for visible wear, odor, dampness, or damage.
- Let cleaned surfaces dry.
- Return only what belongs and leave space to clean again later.
That is enough for a focused seasonal reset. The room does not need to feel stripped. It should feel easier to see, easier to use, and easier to care for when the next layer of dust appears.